
Before & After: A Renter-Friendly Wallpaper Trick Makes This Bathroom Door the Star
I have a confession to make: When I first toured my apartment, I did not look behind the bathroom door. Rookie move — I know. I was enamored by the large bedroom and ample closet space that I didn’t have in my previous apartment. And, to be frank, the offer was too good to refuse. So I signed the lease and moved in shortly thereafter.
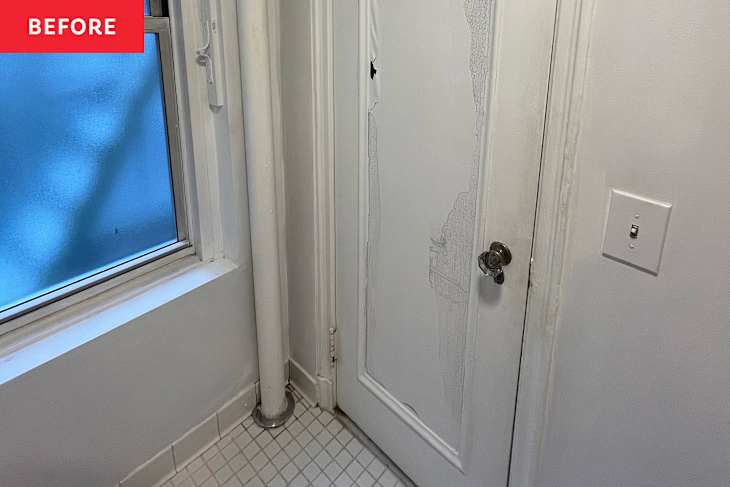
It was then that I realized my mistake. The bathroom door was slightly more closed than it had been on my tour, and, through the reflection in the mirror, I noticed it. The paint on the back of the door was so cracked, peeled, and bubbled, it looked like my skin after a week at the beach (I’m a pale New Yorker who burns easily!). Upon further inspection, I noticed the position of the door meant it was close to the steam heating pole tucked in the corner. My best guess is that the builder-grade paint that was applied some time ago is not very heat-friendly, and therefore, became susceptible to peeling, chipping, and bubbling easily. Nuts!


I was discouraged, but in reality, the paint didn’t bother me too much. However, I found myself increasingly embarrassed by the state of the door when friends and family would comment on it.
Eventually, as my moving punch list wore down, I knew I needed to tackle the problem. But how?

Replace the door? I’m a renter — not going to spend that kind of money. Power-sand and and repaint? I’m a renter — you think I own power tools?
Peel-and-Stick Wallpaper to the Rescue!
I decided the best answer was to cover it with wallpaper (peel-and-stick wallpaper because — you guessed it! — I’m a renter). I fell in love with a wallpaper pattern by Chasing Paper that my friends used in one of their bathrooms in their Puerto Vallarta rental property (shout out to Casa Carajillo!). I knew it would provide the right amount of whimsy and distraction that I was looking for. Once I had all of the materials in hand, it was time to get to work.

The biggest challenge was the removal of the paint and getting the door to a place where it felt smooth and even. I’m pretty sure this is the original door to the 100-year-old building, so it’s a veritable Everlasting Gobstopper of paint layers.
It took a lot of elbow grease and questioning why I started this project in the first place. I knew the sanding (by hand) didn’t need to be perfect since it was just going to be covered with a durable wallpaper, and eventually, I got it to a place that I felt good about.

The wallpaper itself was very easy to install. I only needed one roll given the size of the project, so I didn’t need to worry about lining up multiple mermen. And the width of the roll — and its generous overlap of the inner door frame — made it easy to cut around.

Once the wallpaper was up, I decided to give the door and its frame a fresh coat of paint. I used primer and paint that was leftover from when I moved in. This helped keep the project affordable and ultimately renter-friendly. I absolutely love how it turned, and now everyone comments on how fun the door is when they visit.
Design Defined
Never miss the style inspo and recommendations you crave with Design Defined. Follow along each week as our Home Director Danielle shares the best style advice, latest trends, and popular decor finds you just can't miss.