
I Transformed My Bathroom Thanks to Two Tiny Tweaks (No Renovations Needed!)
Last year, I transformed a dated bathroom in my suburban Cleveland home into the modern “Smurf-blue” oasis of my dreams. It’s still one of my proudest DIY projects — a labor of love that took close to four months to complete. And once it was done, I needed a serious break from power tools, but that doesn’t mean that I am content sitting still.
The thing about home design is that you can always tweak a thing or two. A refreshed room doesn’t have to require heavy lifting or a huge investment.


The one thing my beautiful bathroom was really missing was window treatments. I quickly realized that any kind of drape would compete with the shower curtain adjacent to the window, and blinds just seemed blah.
Without the budget for custom roller shades, and looking for something both functional and fabulous, I decided to hack my way into stained glass windows by way of Amazon. I picked out this vintage-inspired 17.5×39.4-inch roll of iris-patterned privacy film, which only cost me about $13. And it wasn’t a random choice; I actually have irises growing in my backyard, so the floral design perfectly ties in the outdoors with the indoors.

Installing the window film was ridiculously simple. All I had to do was wet the window and apply the film, then push out the air bubbles. It’s been more than a year since the faux stained glass made its debut, and I have not had to adjust it once. It has held up through both sweltering summer days and frigid winters so far!

This little change made a big difference in the overall mood of the space, but it was still missing something. Originally, I chose Behr’s Night Blooming Jasmine white paint for above the trim and the violet-tinted Clark + Kensington’s Jet Setter paint on the lower portion for dramatic effect, but after the initial excitement of a new bathroom wore off, it still looked a bit unfinished. To stay true to my color scheme, I kept an eye out for any and all blue wall decor to tie some color back in above the wainscoting.
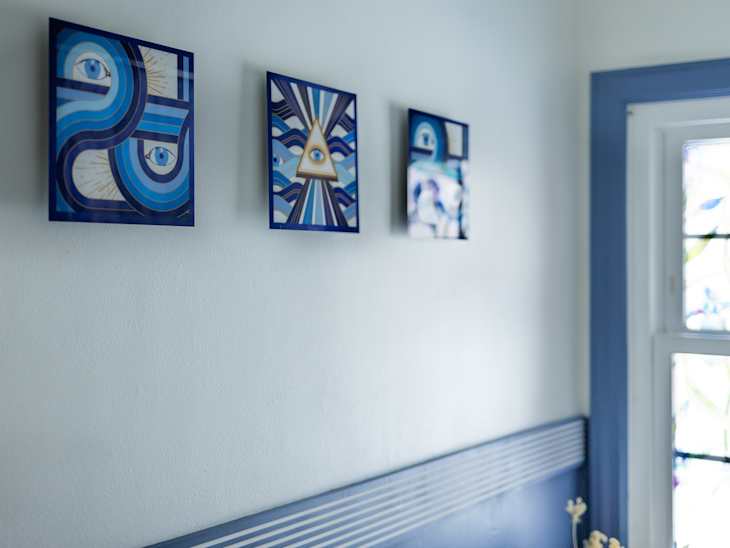
When I spotted the evil eye motifs in the TilePix x Jonathan Adler collaboration, I knew they would be perfect. I was hypnotized by the myriad of blues on each one. I decided to mix-and-match the tiles and curate my own design, and eventually chose the waves, loops, and evil eye pyramid. This trio of designs might be unexpected for a bathroom, but I love that — and the colors are just perfect!
And don’t get me wrong, I was serious about that power tool hiatus I mentioned above. Thankfully, TilePix works by attaching a peel-and-stick foam as a base, which is magnetized to hold up the artwork. All I had to do was level and align the trio of pieces and snap them into place — I didn’t even need to touch the hammer and nails. And I love that if I do get tired of this design, replacing it with new TilePix options will take seconds.
These two colorful details not only gave the bathroom design more depth but also added a much-needed personal touch, especially the faux-stained glass irises. The backyard blooms were planted decades ago by a previous owner, and my little touch gives nods to the history of the home. And now, my beloved Jonathan Adler illustrations tie it all into the present.