
I’ve Never Seen a Headboard Like the One in This Stunning Bedroom Makeover
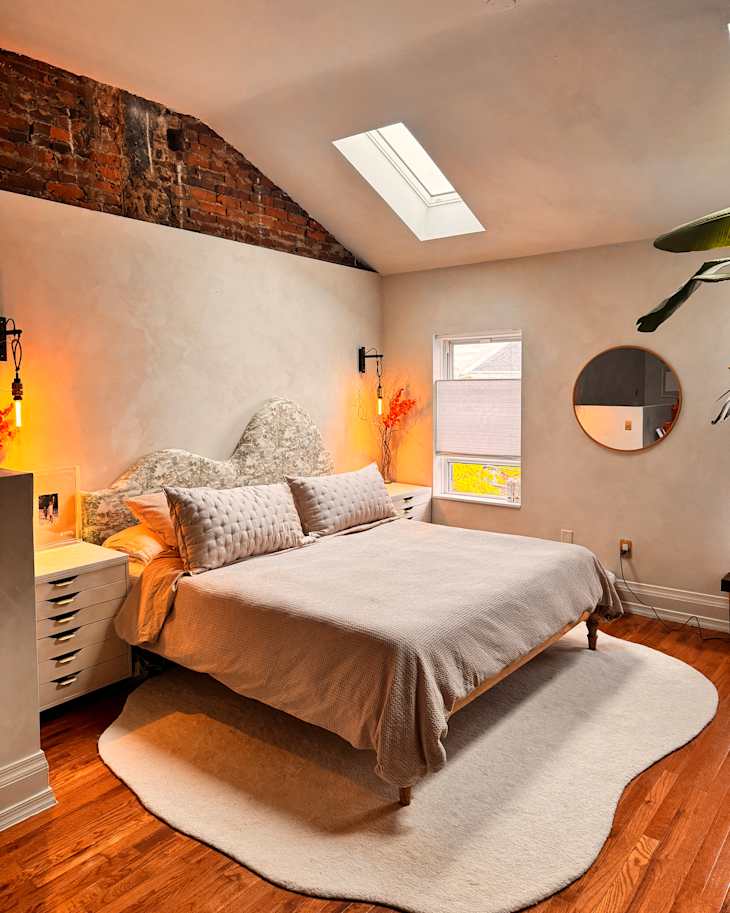
When Karis Samuelson Idowu (@karisalexis) and her husband, Jarvis, moved in together, their primary bedroom was in great shape; it just needed a bit of styling help. “I knew the space had potential, as it had wonderful lighting,” Karis says. (Jarvis bought the home in 2019 and added skylight windows and a raised ceiling.)
“I felt, however, that the bedroom was quite masculine and didn’t match the new bathroom we had created,” Karis says. She wanted to add a bit of “softness to the space and to create a romantic, serene bedroom with lots of texture.”


Limewash was a beginner-friendly DIY.
She and Jarvis started by painting the walls, as Karis wasn’t a fan of the gray-blue walls against the navy blue of the headboard, dark wood flooring, and nightstands. “I went with an instinct and picked a limewash color online,” Karis says. “When that arrived, I did a test patch and fell in love with it.” (She picked Vasari Lime Plaster Paint in Fossil.)
As for its application, that was super easy, Karis recalls. She recommends watching a tutorial online and then grabbing your brush and giving it a go. “You can’t really go wrong,” she says. “Any mistakes can be rectified by going over the area with a diluted solution or a different brush stroke.”


The custom headboard was a bit more daunting.
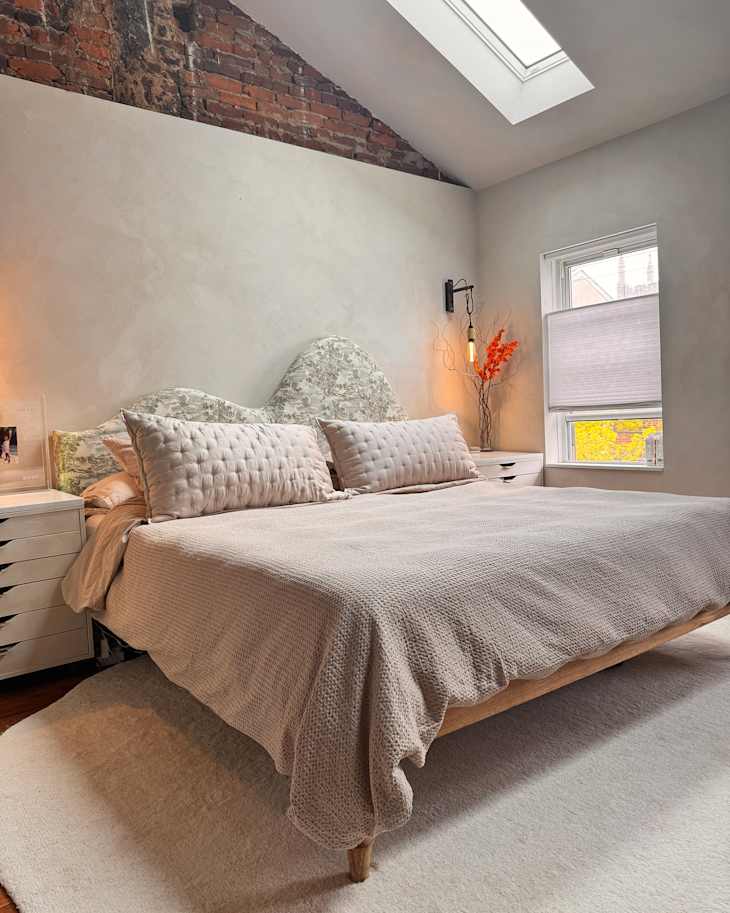
Karis and Jarvis had already selected an asymmetrical rug for their bedroom, and they wanted a fun headboard to match. “Realizing that our old navy blue headboard was just not going to cut it, I watched YouTube videos on how to make your own headboard,” Karis says. She sourced fabric online, and Jarvis cut the wavy frame shape.
“We spent a day cutting the shape, sanding the frame, and then putting the padding on,” she explains. “When that was done, I sewed three panels of my fabric together to give the length, and then we upholstered the headboard ourselves. We attached it to the wall with French cleats, and voila!”
Karis says one of the hardest steps of the project was picking a fabric pattern she liked. She looked at 1,500 samples and ended up picking the very first one she liked. Then it was challenging to line up the pattern of the fabric and sew it together so that it would be straight and seamless-looking on the headboard. But it was worth it because Karis says building their own headboard saved them thousands compared to professional custom upholstery.

An IKEA hack completes the bedroom.
“The bedsides were an IKEA upcycle,” Karis says. She painted IKEA ALEX drawer units to match the limewash walls, and then, wanting a smoother surface than limewash to set cups and other nightstand essentials on, she and Jarvis found a stonemason’s yard that would cut stone tops for the piece. “We negotiated a great discount, as oftentimes people will commission countertops from a larger piece of stone, and there’s always smaller leftover pieces,” Karis says.
“All in, I would say we spent about $2000,” Karis says. She estimates she and Jarvis spent about $400 on a new rug, $300 on the stone tops, $300 on lime wash paint, $300 on headboard fabric, and $400 on paintbrushes, plywood, foam, and new bedding. “I love everything about the after,” she says.
Although Karis and Jarvis did several DIY projects in their bedroom, Karis says the limewash made the biggest difference. “The natural light in the room picks up on every brush stroke and creates this gorgeous cloud-like texture,” she says. “We’re so in love with the finish [that] we’ve opted not to put artwork back up above the bed, as we feel like the paint finish is its own feature.”
Inspired? Submit your own project here.