
I’m Calling It: The “Bejeweled Tree” Is Going to Be Your New Favorite Holiday Decor
Christmas decorators usually fall into one of two camps: those who love to decorate with their same favorite pieces every year, and those who like to change it up regularly with completely new elements. But no matter which side you fall on, I’ve found one DIY that I think everyone can get excited about: the bejeweled tree.
You might remember the popular cottagecore-style bow trees that took over for the past couple of years, and the bejeweled trend isn’t so far off. But instead of adorning branches with bows, it calls for decorating with strings of faux pearls and other glitzy touches that make your tree feel super luxurious.

Want to get the luxe look? Here’s how I created my own bejeweled tree last year, and what I learned to make it even better this year.
How to Decorate a Bejeweled Christmas Tree
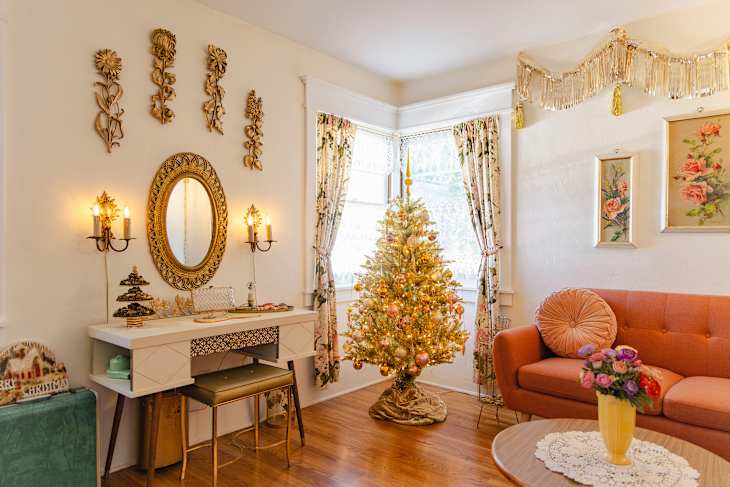
I actually already tried out the bejeweled Christmas tree last year, about two seconds after seeing someone else’s gorgeous version in an Instagram post from an event venue.
I was so absolutely dazzled by the strings of pearls and the sparkly lights that I knew I needed it in my home.
To create my version of this look, the first thing I did was add a few strands of white lights like these to my tree.

Then, I draped strands of these faux pearls around the tree into what I’m calling “swoops,” or multi-stranded sections. Starting with one strand, I looped the end around one branch a few times to secure it, allowed it to drape down a bit, secured it on another branch nearby, then cut the end of the strand with scissors. I would repeat this several times until the swoop had several strands, being sure to alter the length of the drape so the strands fanned out a bit from each other.
You could also approach this like you would any garland: by wrapping it around the tree, but allowing a lot of slack between the branches so you get the pretty draped effect.
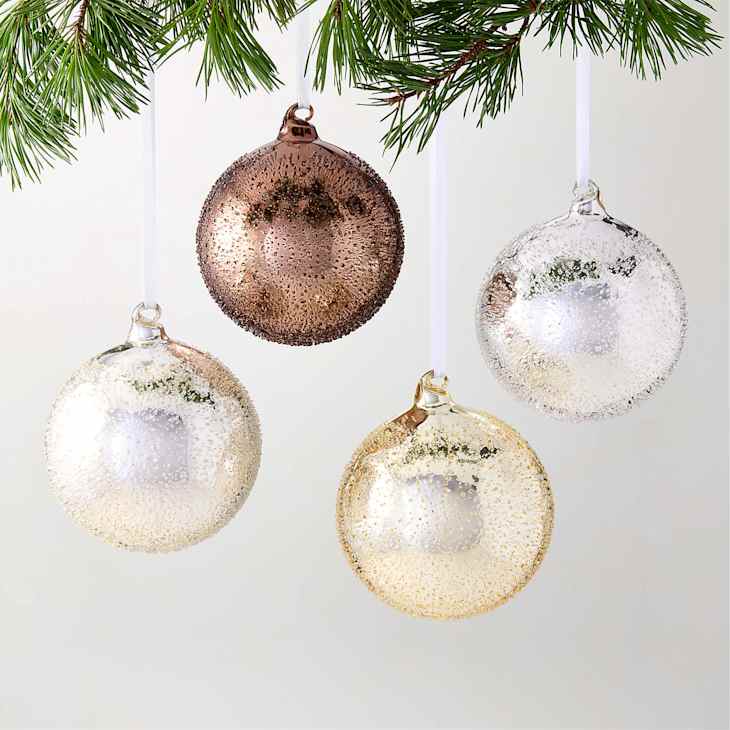

Once the strands of pearls were set, I hung 18 translucent, Champagne-colored glass balls around the tree that I got from CB2 several years ago. Unfortunately they no longer sell this particular style, but I found this CB2 alternative that I think would look great, too, as well as this set from Michaels.
3 Tips I Recommend for Your Bejeweled Tree
While it’s a simple look, creating it does take a little finesse. Here are a few things I learned last year that will help you this year.
Choose a tree with a little less fluff.
In order for the strings of pearls to be able to drape freely, you need a tree with branches that are spaced several inches away from each other. I ended up just cutting off some of the branches from last year’s tree to make things look a little neater, and I still recommend this strategy either way if some branches are in the way. But it’ll be a lot easier to hang the strings of pearls if you already have space between layers of branches.
I always use a real tree, but for those who go the faux route, try bending the branches to give a little space between.
Get more spools of pearls.
I only had two spools last year, and wished I had twice as many. I improvised as best as I could, but this year I have ordered five just in case.
Use more pearl strands per swoop.
At first I just did three strands per swoop, which made the tree look very chaotic. It was looking a lot more like a spider web than a Christmas tree. I realized in order to get a neat and tidy appearance, the swoops need to be bolder — almost appearing solid.
In the end, I added up to five more strands to each swoop, which made a world of difference. To get this effect, I recommend using five to eight strands to make up each swoop. And honestly, I think this is one of those cases where more is more. If you want to pile on the pearls, I think it will only look better!