
This DIY-Filled, Dramatic Bedroom Makeover Cost Less Than $500
Sometimes rooms go through in-between stages before a tenant or homeowner lands on the final layout and wall decor. Daniel’s (he/she, @danielsqueerbau) bedroom certainly did. When he moved in, it was “a boring landlord white” that felt like “a hospital,” he describes. He gave the bedroom a purple paint makeover with diagonal lines, but even after a while that didn’t feel quite right; he wanted something more dramatic and less early 2010s DIY.
“I’d always wanted a completely black, moody bedroom,” Daniel says. “I started with black paint, but didn’t have enough, so I mixed all the leftover paint I had and created a deep greenish color. That inspired me to take on the whole room.”


Molding adds Parisian flair.
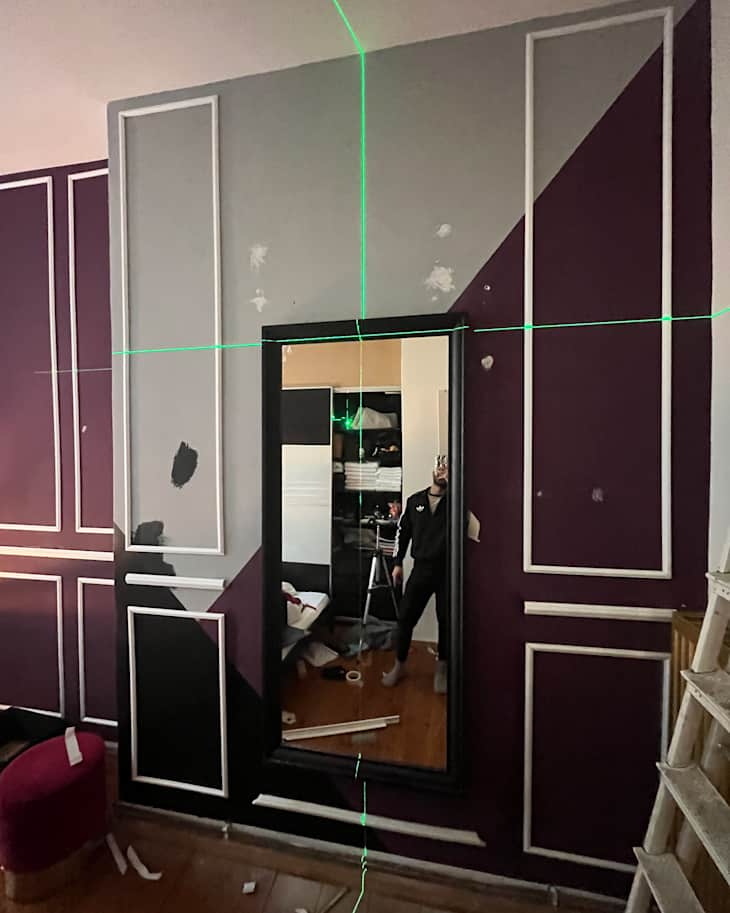
But before painting, Daniel added architectural interest with molding. “I’d seen it all over Instagram but thought it would be too hard or too expensive,” she says. “Real wood molding was out of budget, so I used plastic ones I ordered online for under €100 [about $114 USD], including shipping. It turned out amazing and was easier than I thought.”
A laser level helped for installation on the 1920s bedroom’s walls, which weren’t totally straight.


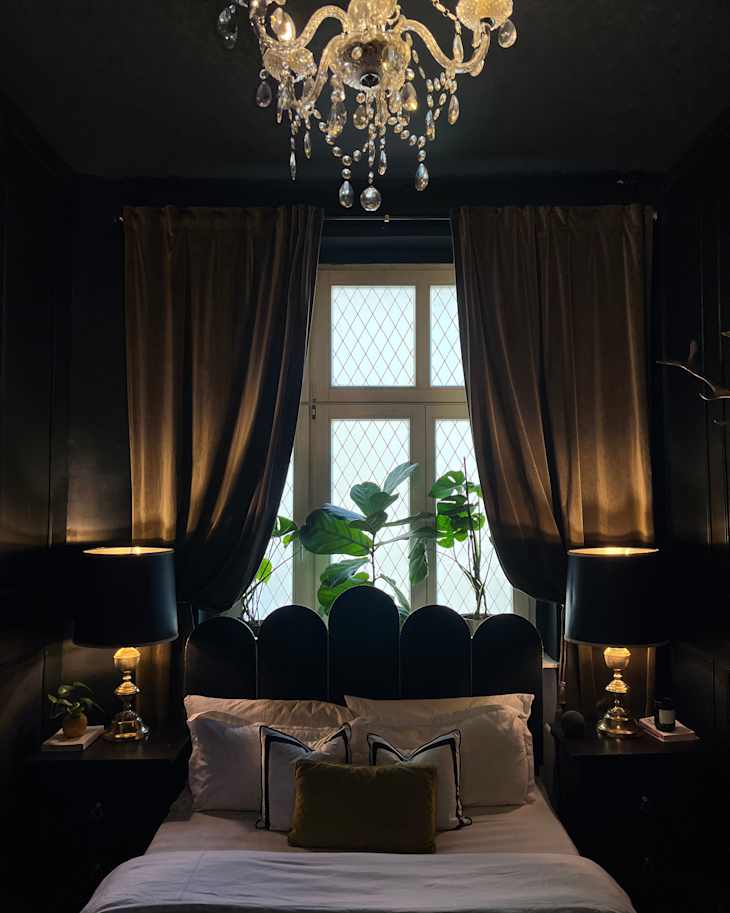
The walls got an inky, dramatic makeover.
As mentioned above, Daniel doesn’t know the exact name of the greenish black paint color on the walls because she blended a lot of paint to create the shade, but she does know it’s “luxurious, dramatic, and peaceful.”
“It’s dark at night — and even during the day if I close the curtains — and it helps me sleep better,” Daniel adds.
Two other elements that got a paint makeover in the room? The radiator, which Daniel spray-painted gold; and the mirror, a thrifted find which got some ornamental trim and red paint.

The entire bedroom makeover cost under $500.
“Every single element was either thrifted, reused, or DIYed,” Daniel says of the room transformation. “Nothing was bought new at full price.” The lighting (the chandelier, fringe sconces, and brass table lamps) were all eBay finds, and the former cost only $11. The nightstands are from IKEA (bought secondhand), and the headboard was a DIY project.
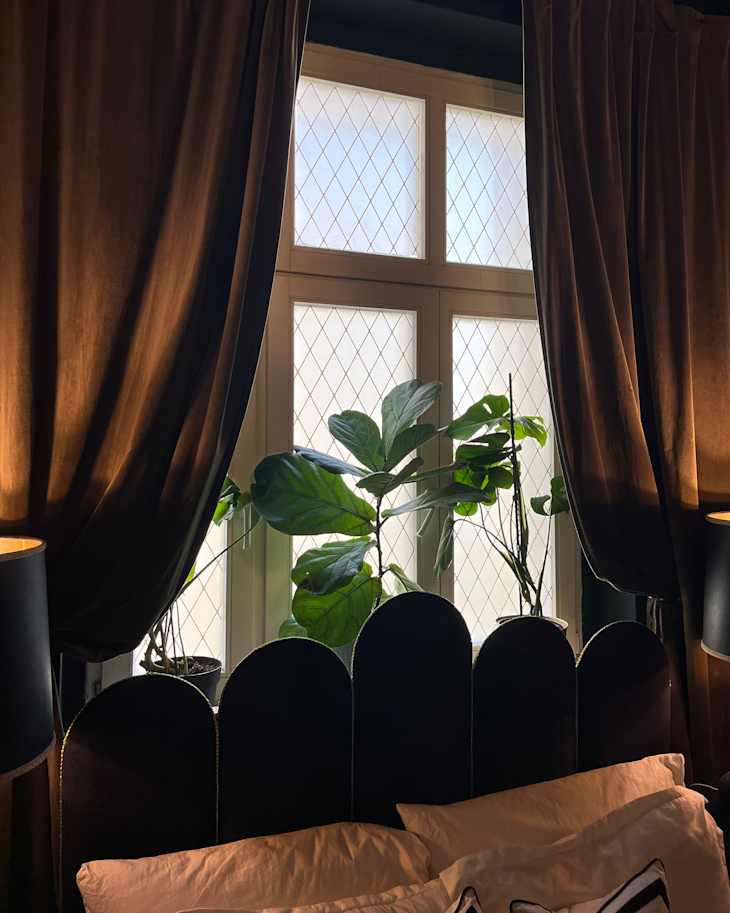
Daniel made his own headboard with plywood and velvet fabric, and he attached it onto the slatted headboard from before. That cost under $57. And behind the headboard, he added $6 cross-hatch-patterned window clings for privacy. The only thing he liked about the pre-existing space, the original floors from the 1920s, stayed.


The PAX closet is a functional upgrade.
One of the biggest difference-makers in the bedroom, Daniel says, is the new closet. She “learned how to fake a built-in closet look with simple materials,” she says. “I started by removing my old, tiny closet and open clothes hanger. They went straight to the trash. I wanted a built-in wardrobe, and discovered that the IKEA PAX system fit the space perfectly.”
The PAX was a bit too short to stretch all the way to the ceiling, though, so Daniel added plywood on top to close the gap and create a custom look. “The only thing still on my list is changing the wardrobe doors to mirrored ones — not only for light, but because it’s sexy to have mirrors in the bedroom,” she says.
Also sexy? A design and DIY vision that’s well-executed. “I learned that creativity and resourcefulness go way further than money,” Daniel says.
Inspired? Submit your own project here.