
My DIY Closet Reno Saved Me So Much Space (I Wish I Did It Years Ago!)
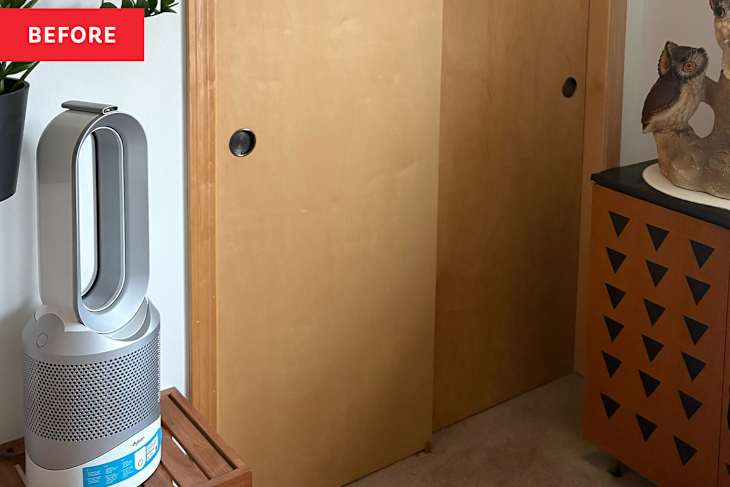
My husband and I bought a builder-grade home in 2009, and since then we’ve made many, many changes to it. But one of the features simply evaded our efforts through all these years: the sliding closet doors. The most annoying of these were in my office. They made it very difficult to access the storage space, as that closet is small and has a cabinet next to it that limits movement even further.
Bypass doors make it impossible to access both sides of the closet at once, and I’ve never really been a fan of them in terms of style, either. So I knew I wanted to remove them, but what would I replace them with? Bi-fold doors aren’t much better-looking to me, and removing the doors entirely would put my clutter on display. Then, I had an epiphany: What about a curtain?


How to Replace Your Closet Doors with a Curtain
I measured the space to figure out the exact size I’d need, and decided how to hang it — with an adjustable tension shower rod that wouldn’t require any drilling. I bought one in champagne gold to make it look a bit more chic. I found a boho-style curtain that matched the vibe of my office from World Market (the exact one I got isn’t available anymore, but I highly recommend World Market for curtains! They have some cute boho styles, like this tufted floral one below).

I placed the curtain on the rod, adjusted it for the closet opening, and voila! I had an instant, chic “closet door” that only took about five minutes to put up. And it’s a fraction of the cost of installing new doors. Removing the original doors was a cinch, too — just look for a tutorial on YouTube.

The result of my little curtain experiment? A closet “door” that opens all the way, which allows me easy access to anything I need. In fact, it’s so accessible that I was finally able to easily and effectively organize my cluttered office closet. In the span of an afternoon, I transformed my office space with a serious dose of style and convenience.