
The Keys to Making a Gallery Wall Look Timeless (Not Trendy)
Gallery walls have been going strong for a while now in home design. That’s probably because they’re the perfect solution for filling up blank wall space — until, well, they’re not. If we are being honest, gallery walls are actually pretty difficult to pull off. Sure, it’s your home and ultimately anything goes. But haven’t we all seen a gallery wall or two that’s awkward, either in terms of the spacing or placement of pieces, frame selection, or heck, even the amount (and style) of items?


A gallery wall should really always be a work in progress — something that continues to grow until it reaches the state of being potentially wall-to-wall, ceiling-to-floor salon style for maximum impact. A small cluster of random artwork on a wall feels too try-hard, right? But I guess you’ve got to start somewhere and acquire works that mean something to you over time. So as you go about that process, let’s take a look at some fully “mature” salon walls that get it right and figure out why. That way, you’ll have some guidance and inspo for your own project.
Elevate a Gallery Wall With Oversized Frames
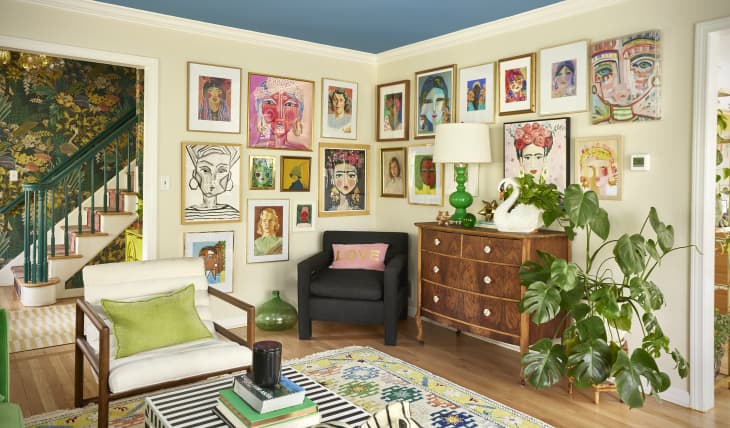
“Go big or go home” is maybe one of the most annoying phrases that the recent zeitgeist has given us. But when it comes to a gallery wall, this phrase really does ring true. A bunch of busy artwork on a big blank wall just looks awkward (though the above image may be somewhat of an exception to this rule).
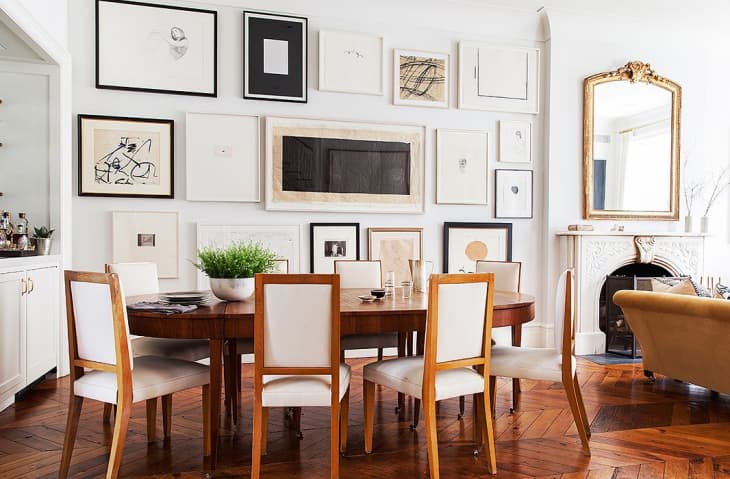
So for best results, try to follow the lead of Haven’s Kitchen founder Alison Cayne, who not only went floor-to-ceiling on her dining area gallery wall, but also managed to fill it with super tasteful, substantially sized pieces. Nothing appears to be in a frame that’s smaller than 11 by 14 inches, which is not to say that small artwork is never the answer. If you look closely, many of Cayne’s pieces are quite small.
But the framing and matting makes them look grand and that makes all the difference, especially on a full wall in a home with high ceilings. So when all else fails, buy big artwork or frame your pieces to make them look bigger.
Anchor a Gallery Wall with a Bold, Off-Center Piece
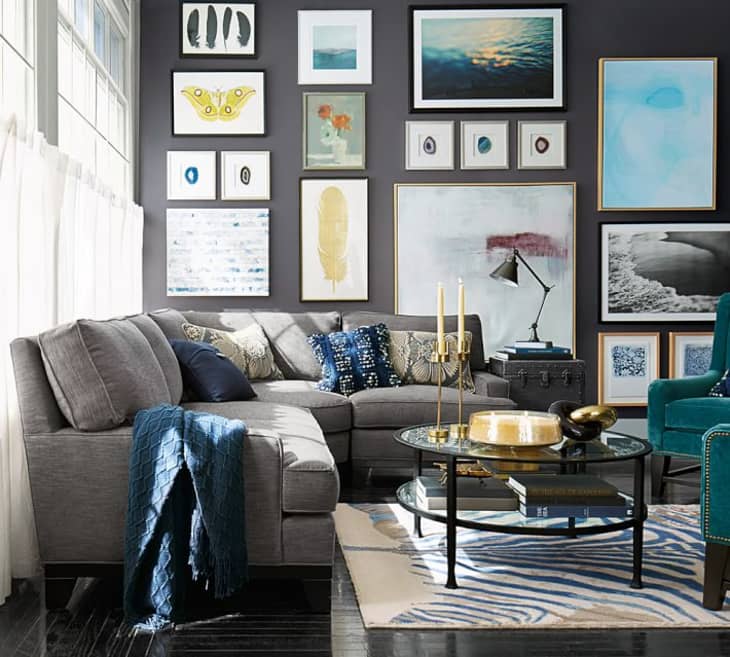
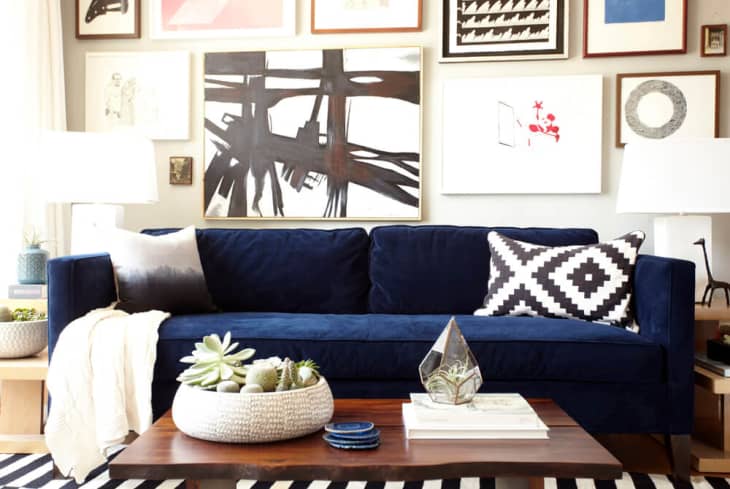
If you’re a newbie to this whole salon wall thing, a good rule of thumb to follow for a mature, balanced composition is to start with one large anchor image. It grounds the whole arrangement and provides a framework for building out the rest of your wall. In this example from Pottery Barn, it’s definitely the huge square abstract picture with the maroon stroke of paint.
There are a few other large works around it, because remember, your goal is to fill up the wall. But there is usually one thing that’s bigger than the rest in good gallery walls, and best not to place it right smack in the middle of the wall. A little off-center is more interesting to the eye and therefore more visually pleasing. Your anchor image can also inspire the general color palette and mood of the rest of your scheme.
Create Visual Interest by Mixing Curated Items
Curating pieces is another big part of the equation, and it shouldn’t happen overnight. The best gallery walls showcase items from a variety of media—photographs, drawings, paintings, prints, and so on, like this one. Great if you can add something vintage to the mix as well.
While it’s ideal to collect over a longer period of time, it’s okay to throw some temporary place holders into the mix. Or to change things up if some of your old go-tos are feeling stale. Another takeaway from this setup: it’s totally fine to throw pictures up onto a patterned or colored backdrop. Though, unless you’re a true maximalist, be sure the pieces are cohesive.
Balance Black and White Artwork with Pops of Colors
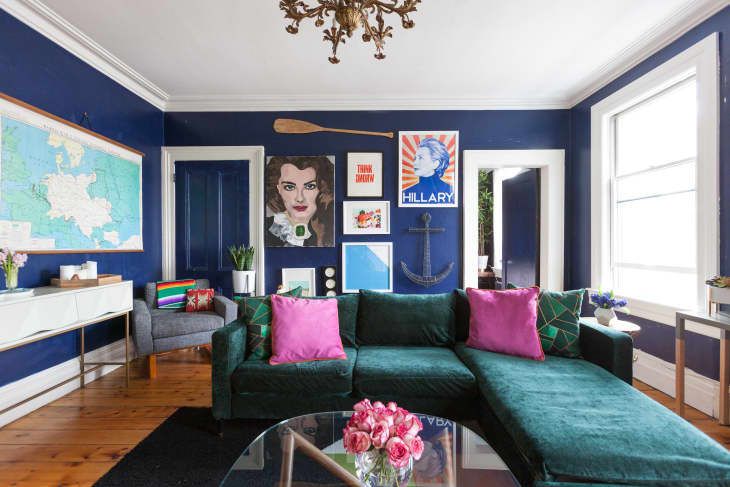
Come to think of it, a cohesive color palette is never not a good idea, even if you’re keeping it simple with white walls that can handle a more colorful mix. That’s exactly what designer Orlando Soria did in this room makeover with Emily Henderson. The bulk of his items are black-and-white, but he threw some pops of pink, yellow, and blue in there for good measure. And some of the colors in his wall reference his accessories and furniture, which again, creates a visually pleasing path for the eye when viewing a room.
Frame Your Furniture with a Floor-to-Ceiling Gallery Wall
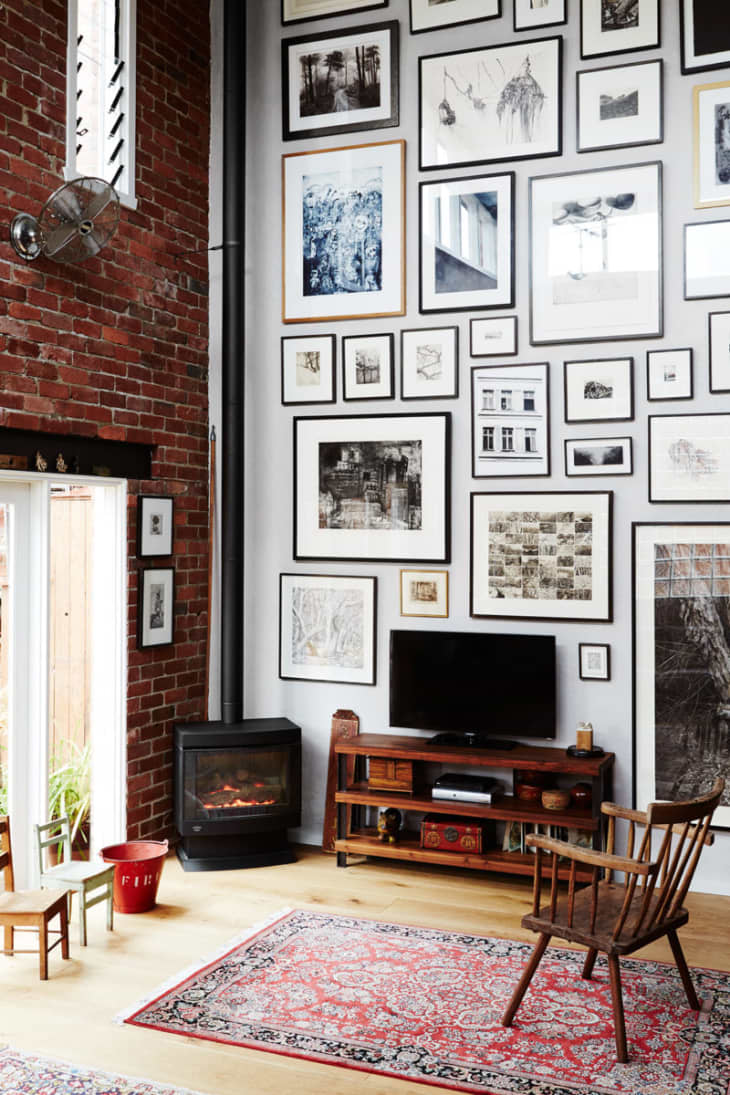
Similarly, another thing to keep in mind: A mature salon-style gallery wall doesn’t exist in a vacuum. It’s perfectly fine, and in fact, encouraged, to work pictures around the placement of your furniture and other items in your room. You can still do the floor-to-ceiling thing—just place things around your console, chair, fireplace, or whatever else may be along the wall in your space.
One of the best ways to keep a gallery wall evolving is by embracing a configuration with irregular borders, especially as you get things started. That way, you can continue adding on to the arrangement organically. Forget the concept of a grid (which can be done well, but can sometimes feel a little stuffy) and go rogue. The setup may cover a lot of blank wall, but there’s definitely room to add around the edges both horizontally and vertically. Again, larger-sized pieces come in handy for making this configuration work as is, but you could totally add in some smaller guys as you like.
Foolproof Gallery Wall Formulas That Will Work Every Time
One easy way to pull off a gallery wall is to stick to a monochromatic color scheme, says Katelyn Spacek, principal and owner of Curate Interior Designs. “When we create gallery walls for clients, we focus on a few key elements: spacing, frame sizes and colors, and the artwork itself,” she explains. “Printing everything in black and white gives a cohesive feel, and then we use a variety of frame sizes to layer in visual interest.”
If you’re looking for a foolproof formula, Kacie DeMaio, senior interior designer at White Webb, swears by this approach:
- Plan Ahead: Start by experimenting with layout before committing. Draft an elevation or use paper cutouts on the wall to test different sizes and placements.
- Size Matters: Anchor your layout with the most significant, most important pieces first. Then, fill in with smaller works around them. Try to place the key pieces at eye level to ensure they stand out.
- Align or Misalign: A great gallery wall balances structure and spontaneity. A uniform grid is straightforward, but stagger your pieces for that perfectly imperfect, collected-over-time feel.
- Leave Breathing Room: When possible, aim for consistent spacing, say, 3 inches between pieces. In a staggered layout, this won’t be exact everywhere, but repeated spacing keeps things polished.
Need some visualization? Here are some tried and true methods of perfecting the gallery wall each and every time:

Gridded Gallery Wall
There’s a reason why this gallery wall style is tested and effective for making an impact in a room. Though a gridded gallery wall style will take a lot more effort to measure out, in the right space this can be very pleasing to the eye.
If you plan to add to a gridded gallery wall over time, be sure to purchase extra matching frames just in case they happen to be out of stock in the future.
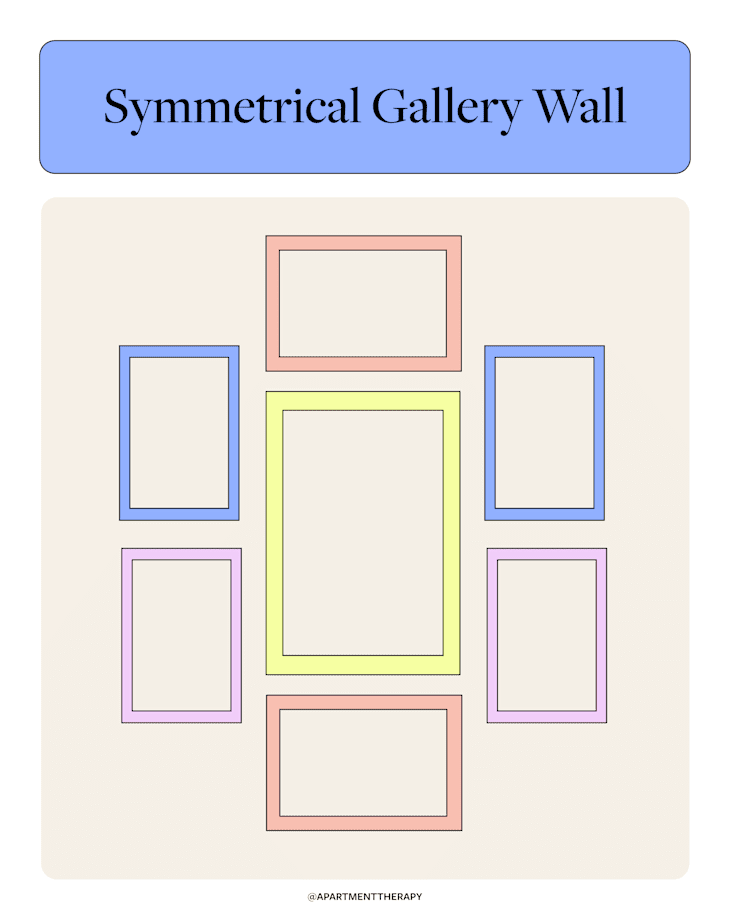
Symmetrical Gallery Wall
Want something a little less rigid than a gridded gallery wall, but still crave clean lines? There are plenty of ways to achieve a symmetrical gallery wall and also inject a little bit of personality. Here we illustrate a larger piece in the middle framed out by two vertical frames on each side and one horizontal frame on the top and bottom.
You can also mix things up by playing with color and mat size to create a truly unique look.
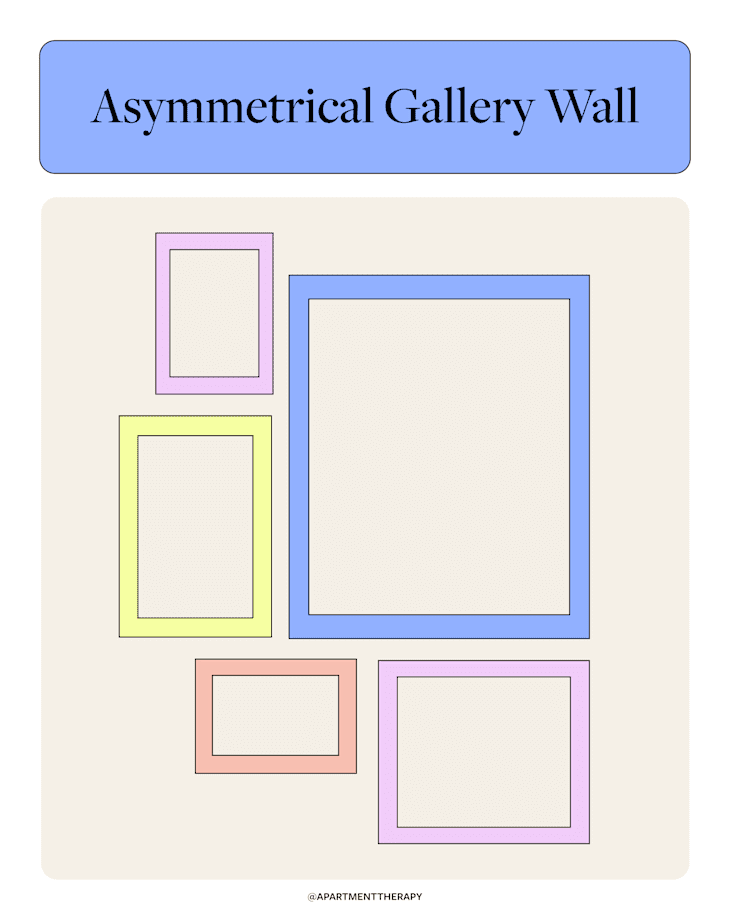
Asymmetrical Gallery Wall
Does the thought of symmetrically hung pictures make you snooze? Try this more whimsical method of hanging photos in a cluster. Different sized photo frames work together to create a true curated-over-time look that can be added onto in perpetuity.
Though it appears there is no method to this photo-hanging madness, it’s helpful if you have a starting edge to work from (as seen on the right hand side of our illustration).

Corner Gallery Wall
Need to fill an awkward corner of a room? Look no further than the unexpected corner gallery wall. This method creates interest in a space that (let’s be honest) is often not intriguing — while still using the principles of a great looking gallery wall (such as even spacing between frames).

Mix Up the Frames
For a more eclectic, layered look, combine frames with different profiles and finishes. Prefer a uniform aesthetic? Keep the frames similar and vary the mat sizes instead.

Think Beyond Frames
Don’t be afraid to mix in unframed art or sculptural wall hangings to bring in texture and dimension.
And remember, your gallery wall isn’t permanent; it can grow and change with you. Swapping out pieces over time keeps the display fresh and meaningful, making your space feel truly lived-in and uniquely yours.