
How to Use Miter Shears, the Beginner-Friendly Tool You Never Knew You Needed

It was during my years working at This Old House magazine that I learned to use a miter saw: a giant machine that was noisy, messy (the dust!), and so very satisfying to learn how to navigate. But it’s not exactly a practical small-space power tool in the way a cordless drill is, so it’s hardly something I’d recommend as a toolbox necessity. What I would recommend, though, is a trusty pair of miter shears.

Unlike miter saws, which are bulky, noisy, messy, and frankly, not super beginner-friendly, miter shears are perfect for novice DIYers who want to take on projects like making their own DIY picture frames or adding trim to doors or walls (so Parisian!). Here’s everything you need to know about how to use miter shears, what to use them for, and where to find them.
Miter Shears Basics
Miter shears are used to cut wood and PVC trim. They can make straight, 90-degree cuts and can also make straight cuts at angles (often 45 degrees and 120 degrees, and sometimes more).

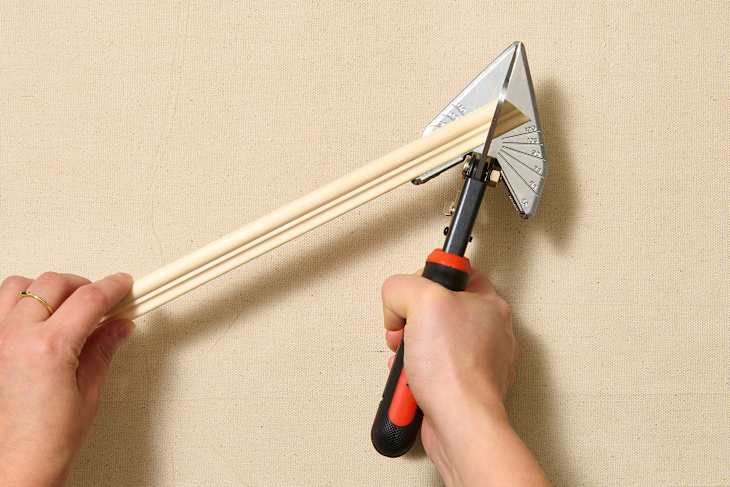
Miter Shear Parts
Miter shears look a lot like scissors and function much the same, too — with a few differences. Here’s what you need to know.

- Handles: The part you’ll hold to work the shears.
- Cutting blade: Unlike scissors, there’s only one blade on miter shears. It’s on the top, and makes a downward cut.
- Locking lever: The mechanism that locks the shears closed.
- Dial: The base plate that marks lines for various angles.
- Angle adjusting pulley: The guide you use to set your chosen cutting angle.
When to Use Miter Shears
Miter shears aren’t the right tool for cutting large pieces of wood, but they’re perfect for making angled cuts to wood and PVC trim up to about 1 1/2 inches wide (you’ll need to check the shears you’re working with for the exact max recommended width).
That means miter shears are going to be your DIY superhero for any project that involves trim, since you can neatly snip the pieces to the exact right angle. Some of the things you can do with miter shears include:
Miter shears have been especially popular among DIYers for installing picture frame molding on their walls, a vintage trend that’s had a resurgence in the past couple of years. Ornate wall moldings are one of the hallmarks of Parisian-style homes (a trend that’s still going strong in 2025!), so if you want the French look, miter shears will be your friend.
The bottom line: Any project that features molding at a roughly 1 1/2-inch width or less, you can do with miter shears. Remember that miter shears can make perfectly straight 90-degree cuts, too!
How to Use Miter Shears
If you can use a pair of scissors, you can use miter shears. This DIY tool is extremely beginner-friendly! Here’s how to use it.
Unlock the shears.
Make sure to move the locking lever so that the shears can open fully. (But always lock them back up for storage!)
Adjust the angle.
Choose the angle you want to cut at, and move the angle adjusting pulley to match that line.
Insert the trim.
Insert the piece of trim you want to cut so that it’s flush against the angle guide. I find that I get the most precise cuts if the trim is touching the guide on both sides of the blade rather than just one. This ensures that I’m actually keeping the trim aligned correctly.
Cut down.
Squeeze the handles to press the blade into the trim and make your cut. You should, ideally, wear eye protection while doing this in case a trim piece goes flying. Thankfully, unlike with miter saws, using miter shears to make a cut doesn’t produce any sawdust.

Where to Buy Miter Shears
You can buy miter shears from hardware stores, but they’re also sold at big-box online retailers. They’re an affordable tool to add to your arsenal, at about $25 to $35 for a basic model. This pair from The Home Depot, for example, is a reasonable $24.97.

Some miter shears are more limited in range than others. I’d recommend looking for one that allows you at least a few different angle options (even if the main one you’ll use is the 45-degree setting).