
See How a Pro Organizer Transformed My Cramped, Cluttered Pantry
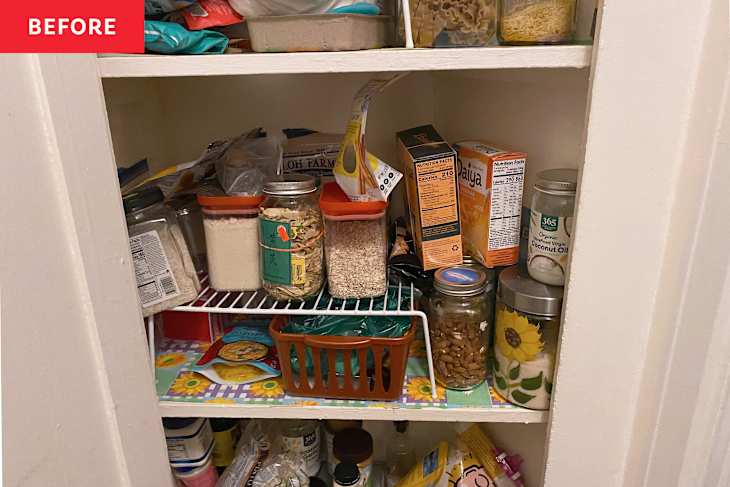
My New York City apartment building is more than 100 years old, and my studio still has some features that seem to be original — including a creaky built-in cabinet that I use as my pantry. Over the past four years, my pantry has become super cluttered and disorganized — it was unquestionably time for a good decluttering and some professional help.
Enter: Cynthia Kienzle, a professional organizer and the founder of The Clutter Whisperer of NYC, who is all too familiar with cramped NYC apartments. I reached out because she specializes in transforming cluttered spaces without investing in too many organizing tools, and I wanted my pantry upgrade to be as eco-friendly as possible. With Kienzle’s tips and a few hours of my Saturday, I was able to give my pantry an incredible makeover without buying anything new! Here’s how I did it.

Step 1: Empty Pantry and Put Similar Items Together
“You want likes with likes,” Kienzle says. Her first step for organizing a pantry is taking everything out — sorting items into piles such as spices, baking items, grains and dried beans, snacks, and canned goods.
Step 2: Get Rid of Anything You Won’t Use
“Toss (or give away) anything you won’t use, including empty jars, and items that have expired,” Kienzle says. I tossed expired foods in the compost bin; I pulled out empty jars to wash and then put away; and I put aside food that I wasn’t going to eat and gave it to my dad, who will eat anything.

Step 3: Replace Shelf Paper
Kienzle describes my floral shelf paper as “loud, distracting, visual clutter.” She believes shelves should be “quiet and clean” and be covered with plain white shelf paper. Instead of buying new contact paper, Kienzle suggests using the back of rolled gift wrap or any white paper. I scored some free white poster board on my local Buy Nothing group, which worked perfectly — and it did immediately made my pantry look calmer.
Step 4: Sort Items by How Often You Use Them
“You want only items you are using front and center,” Kienzle says. She advises putting backup items and baking products on the lowest shelf, as these things are typically used the least. She also says to put tall and stacked items in the back and shorter items in the front for better visibility of what you have. I kept this in mind when I moved each group of food back into the pantry.

Step 5: Make Spices More Accessible
“You want to be able to see all of your herbs/spices at once because they are small and get lost easily,” Kienzle explains. She suggested that I use shoeboxes and lids to contain these tiny jars. This piece of advice was the biggest game-changer for me. I previously had all my spices on the shallow top shelf, and it was always difficult to find what I was looking for. Now, my spices are on a bigger shelf and sorted into three small cardboard boxes/lids, which I can easily slide in and out just like drawers!

Step 6: Contain Items Neatly
Kienzle recommends containing small items like packets and snacks “where reasonable and possible,” but warns not to “over-containerize.” She told me to get rid of my maroon basket, which I replaced with two matching sushi trays for storing packets.
Reorganizing my pantry took several hours, but it was absolutely worth it. My pantry has been cluttered and chaotic for years, and now it’s polished and practical. The best part is that I didn’t spend any money on this project, or buy any unnecessary plastic organizing tools. Needless to say, I’ll be keeping Kienzle’s tips in mind the next time another part of my apartment becomes cluttered.