
I’ve Hung 5 Tricky Gallery Walls — Here’s What I Learned the Hard Way
When we moved into our four-bedroom apartment last year, I knew I had to do something to personalize the walls. Since we had already splurged on two large paintings, I decided to finally tackle creating a gallery wall.
Given our collection of watercolors and drawings — we love to buy art when we travel, and my husband’s a diplomat by day and artist by night — it would’ve been a waste not to hang the pieces we’ve accumulated. With five gallery walls now under my belt, like most things, practice made perfect. From an unexpected hallway arrangement to a trio of pieces on a thin stretch of wall, I’m sharing everything I learned about gallery walls along the way so you can take this project on with total confidence.


You Don’t Need a Ready-made Gallery Wall Set
I often saw gallery wall frames sold as sets, so I always had only uniform, symmetrical setups in my head. That precision stressed me out, which is part of the reason why I put off creating gallery walls in my home in the first place.
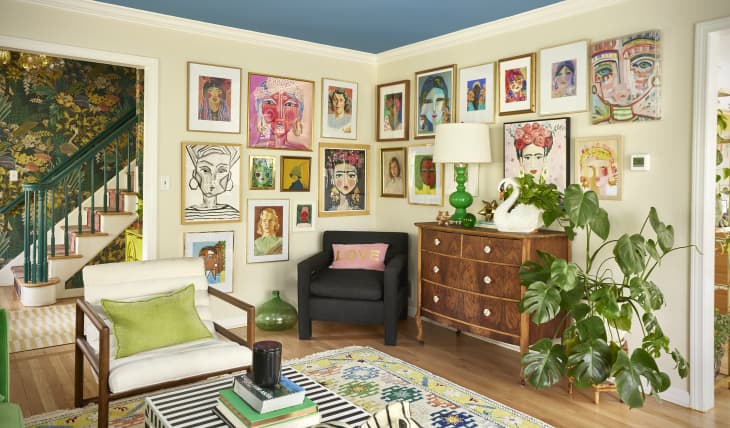
Turns out those sets can actually set you back if you’re looking for an artfully eclectic gallery wall. Because the more variety you have in an arrangement, the better. Steer clear of these “shortcuts,” and instead look for a wide variety of pieces in a range of sizes and with different frames and mats. Incorporating some 3D works, such as masks and wall vases, is another easy way to up the visual interest of your gallery wall.

You Shouldn’t Tackle the Biggest Wall You Have First
Gallery walls aren’t strictly reserved for entryways, accent walls, or the space above your living room sofa. You can put a salon-style wall just about anywhere. That said, if you’re unsure of your ability to get it right, I recommend beginning with a narrow hallway instead of the largest wall in your home.
If you start with a hall, people can’t step back to judge whether or not your frames are properly spaced out, leveled, or aligned. This area can be a wonderful place to experiment and perfect your design and hanging process. Plus, you can continue to add on to a long hall easily as you accumulate more pieces.

Winging It Isn’t the Best Idea
I don’t recommend winging it like I originally did when I hammered down the hallway for my first gallery wall in my current home. By the second-and-a-half gallery wall I hung, though, I had a system in place.
Before nailing anything down, I traced the outlines of my pieces with scrap paper and taped them up first. That way, I was able to get a general idea of how everything would look on the wall. This extra prep step eliminated the need to switch things around after the fact, preventing unnecessary nail holes.

Using a Hammer and Nails Isn’t Your Only Choice for Hanging Pieces
Remember, Command strips aren’t just for hooks. The brand also has Command Hanging Strips, which became a lifesaver for surfaces I couldn’t hammer into, like bathroom tiles, or when I simply got tired of accidentally tapping my thumb when four gallery walls deep. Just make sure you determine the frame’s weight to ensure that you get a strip that’s strong enough to hold it.
These strips can also be a great solution for vintage artwork, which may not even have the proper hanging attachments. Having a few of these in your gallery wall toolkit will come in handy — I promise.

You Don’t Have to Fill Every Inch of a Wall
Finally, you don’t have to hang pictures on every wall in your home — or fill the walls up entirely. Whether it’s a smaller surface that juts out from the rest of your architecture (as shown in my home here) or you just want a few statement pieces above your fireplace mantel, a little can go a long way with a gallery wall. We’ve been calling these smaller, slightly tighter arrangements gallery clusters at Apartment Therapy, and they’re just as visually effective as a floor-to-ceiling gallery wall that’s teeming with artwork.
Gallery clusters are perfect for bump-outs and odd little feature walls that might pop out in your home. The stacked trio I hung in the middle of the wall here was the ultimate finishing touch to what would’ve otherwise been an awkward protrusion.
Design Defined
Never miss the style inspo and recommendations you crave with Design Defined. Follow along each week as our Home Director Danielle shares the best style advice, latest trends, and popular decor finds you just can't miss.